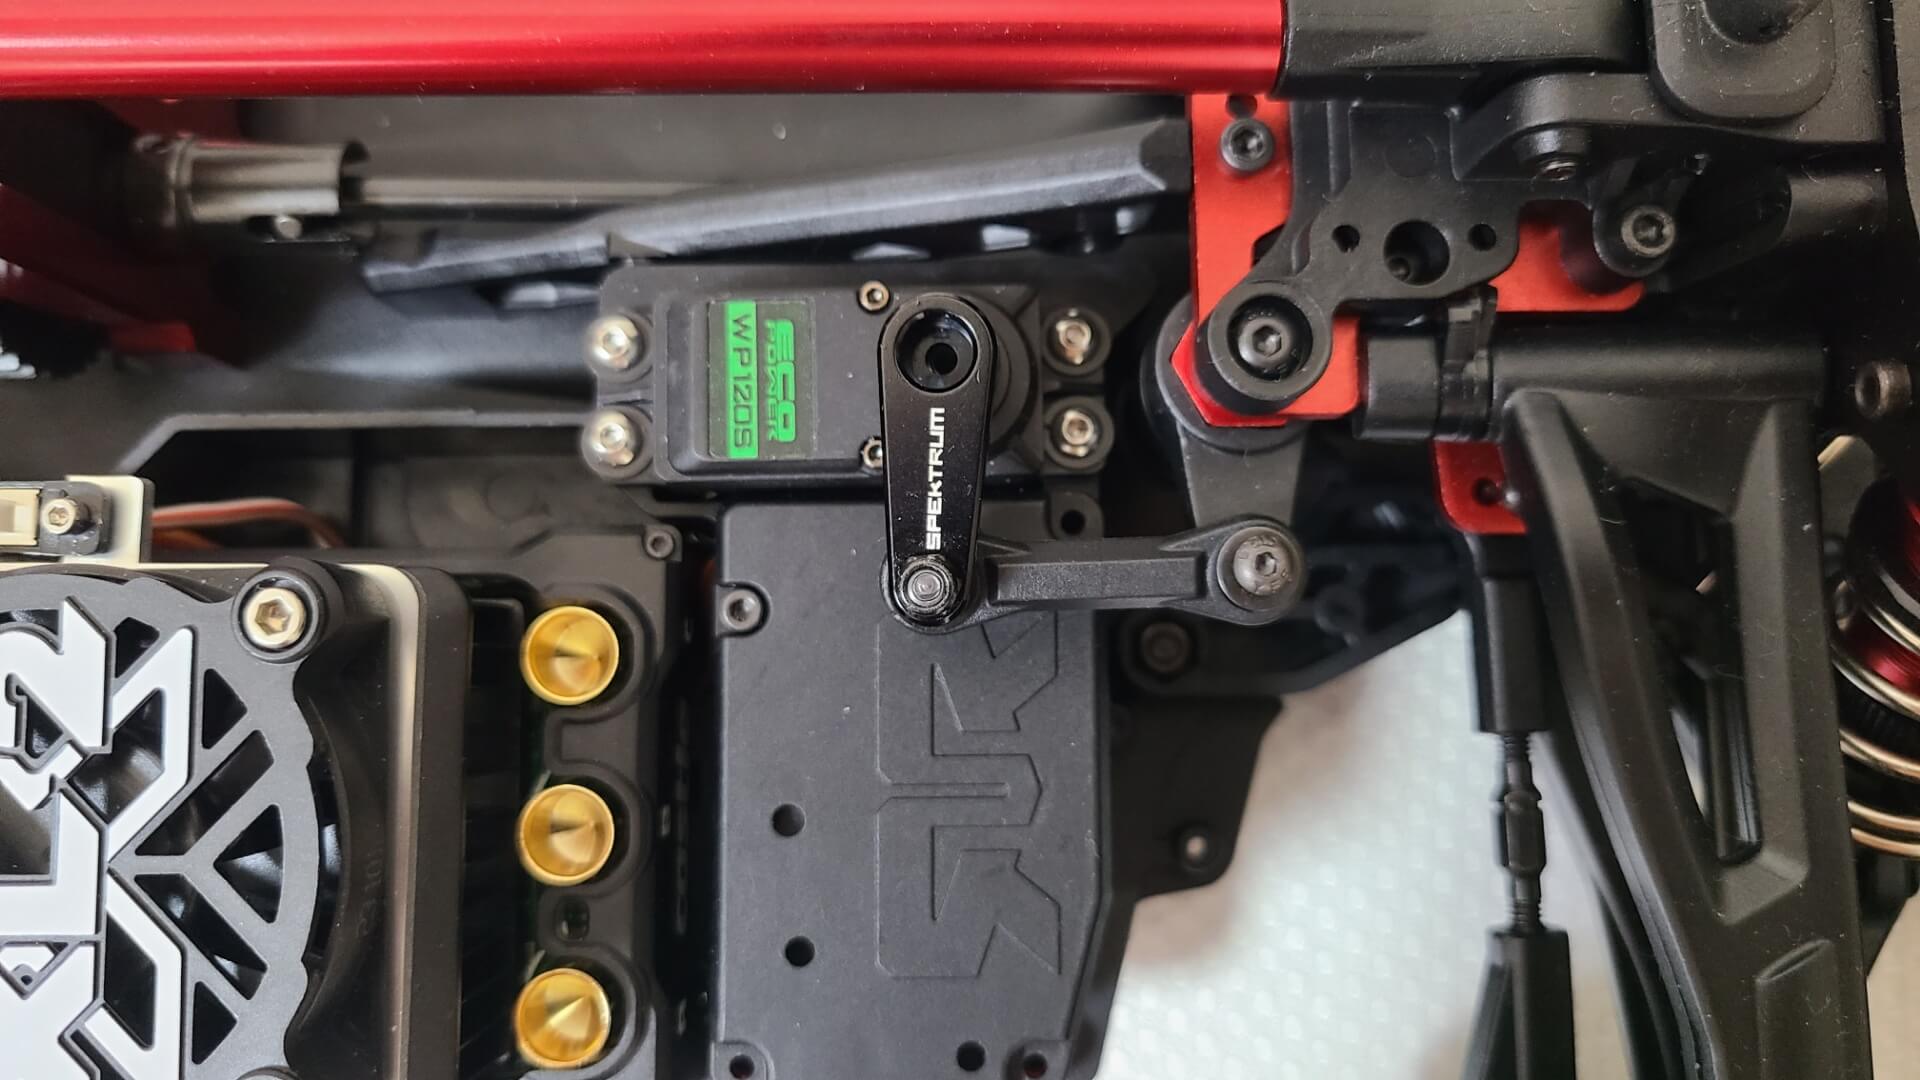
This is part 6 of our tutorial series on how to build Arrma Limitless from the ground up. In our part 5 tutorial, we learned how to install the servo horn. Now, let’s look at how to install the heart of Limitless – the motor.
If you followed the first part of this tutorial series up until now, you shall be able to drive with your Limitless by the end of this section.
List of Tutorials
Below is the list of all the tutorials in this series.
- Getting Started
- Installing Servo Motor
- Installing ESC
- Installing Receiver
- Installing Servo Horn
- Installing Motor
- Spray Painting the Body
- Applying Decals
Things You Need
Here are the things you need to proceed.
- Brushless RC motor – one that fits in a Limitless
- Motor pinion gear – not more than 39T
- Motor wire connectors – if your motor does not come with wire connectors
- Thread-locking fluid – optional but recommended
If your motor does not include wire connectors, then you may need the following items.
- Connectors – these connectors must be compatible with your ESC
- Soldering iron
- Solder
- Plier, vise grip, or soldering third hand – to grab on the connectors
What is a Brushless Motor
A brushless motor is a DC motor without the use of brushes, as the name implies. In a traditional brushed motor, brushes act as contact points between the rotor of the motor (the core) that rotates and the stator (the outer body). These brushes deliver current to the coils in the center core to make it rotate. The magnets are at the outer body.
However, in a brushless motor, there are no brushes. Instead, the coils are located at the outer body while the rotating core is a magnet. Therefore, there’s no need to channel current to the center core of the motor, thus, making it brushless.
It’s obvious that a brushless motor is more efficient and more powerful than a brushed motor because of the lack of friction. Its use in the RC industry has helped propel RC cars to breakneck speed.
Choosing the Right Motor
This subject is open for discussion as it really depends on the individual’s taste, experience in RC, and size of the motor. For RC racing, you’re recommended to use a brushless motor with high kV. For the size, the maximum body length of the motor (excluding the shaft) that could fit inside an Arrma Limitless V2 is 110mm. And this would leave very little room for the motor wires to sit.
In this tutorial, we shall use the TP 4070-SVM 2240kV brushless motor by TP Power. It has a diameter of 40mm and a body length of 107mm, not including the shaft. This motor was used in the Formula 1 versus Limitless drag race.
Choosing the Right Motor Gear
Another subjective topic about RC is choosing the right gear. RC racers often keep this detail a secret from prying eyes because this is usually where you can make or break an RC car. The Arrma Limitless rolling chassis comes with a 39T (Mod 1.0) spur gear. You need to purchase your own pinion gear to attach it to the motor’s shaft.
To calculate the right gear to use, you may use some gearing mobile apps from So Dialed Racetech.
- RC Gear Recommender – Beginner-friendly and easier to use
- RC Gear Calculator Pro – For advanced RC racers
You may need to enter certain information about Limitless when using the apps above such as internal transmission ratio which is 3.31 and tire diameter of 100mm.
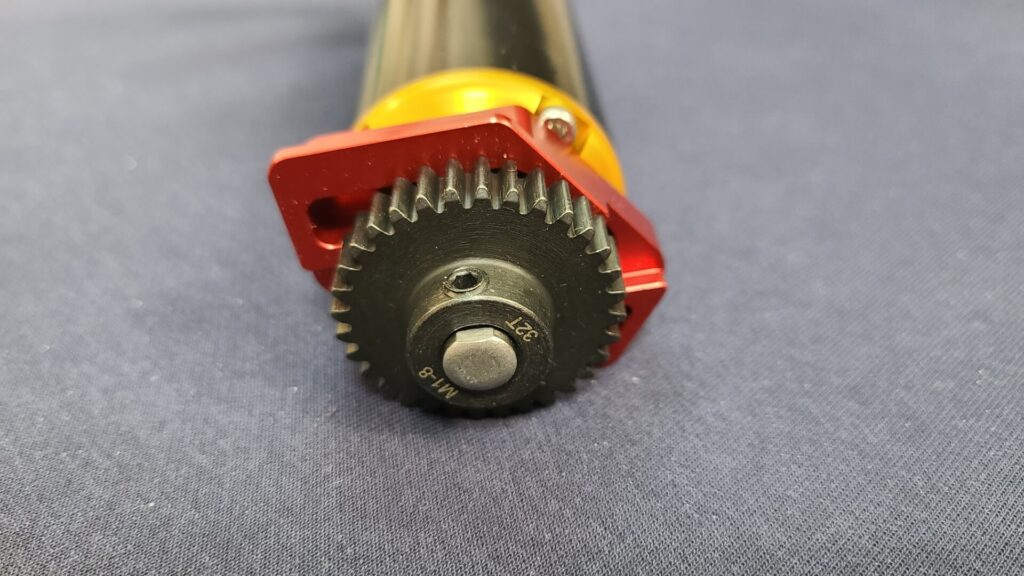
In this tutorial, we shall use a 32T pinion gear, as shown below.

Soldering Connectors to Motor Wires
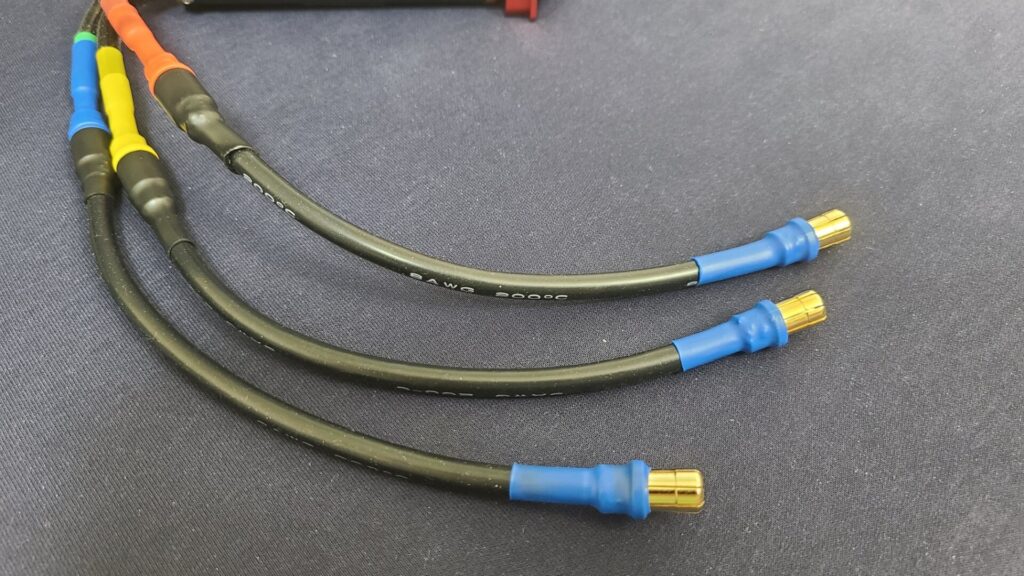
If the motor that you use does not include wire connectors, you need to solder your own connectors in order to connect it to the ESC. Since we are using Mamba XLX2 ESC and TP Power motors don’t come with connectors, we need to solder an 8mm bullet male connector on each of the three wires of the motor. We explained this soldering procedure in a separate tutorial.
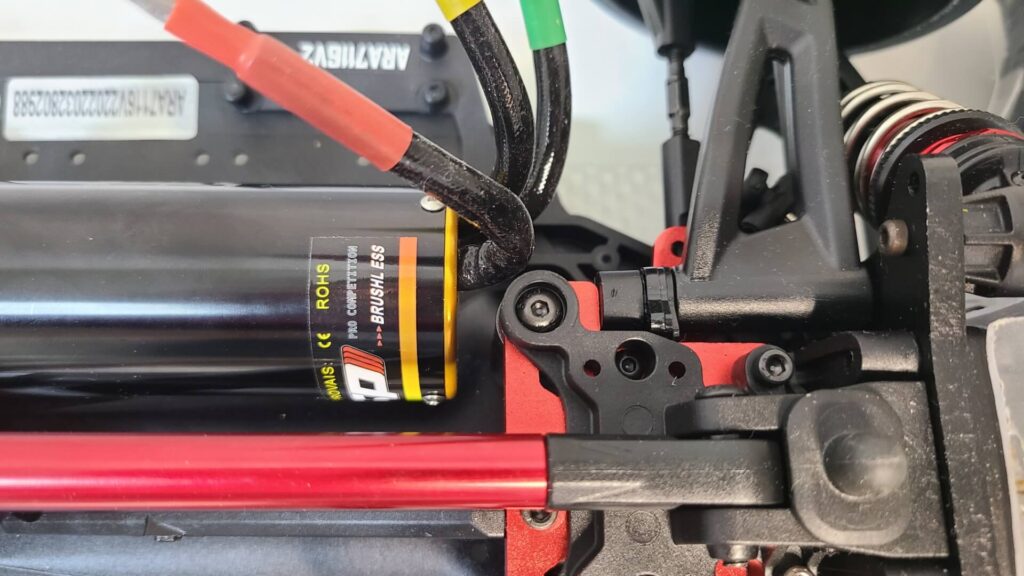
TP motors notoriously come with short wires. So, you may need to extend the wires by connecting them with 8 AWG (or 10 AWG) gauge wires, as shown below. Otherwise, the motors cannot reach the ESC. In our case, the extension cables are 150mm long (tip to tip) with more than enough slack.
Install Motor Bracket on the Motor
You may remove the motor bracket from the motor mount by removing the top two screws holding it to the body.
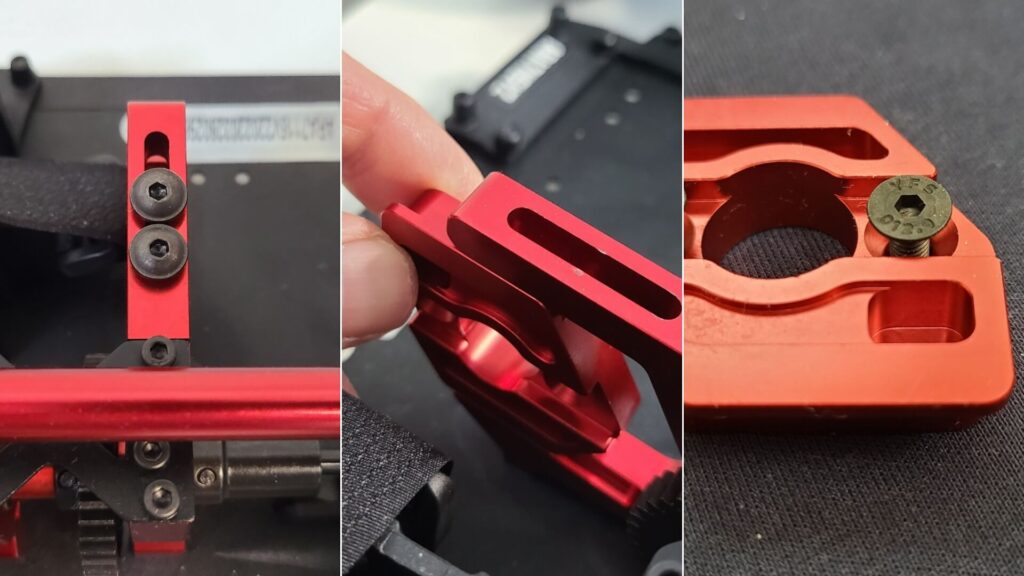
Once removed, attach the bracket to the front of the motor near the shaft and use the two screws provided by Limitless to secure it in place. You should apply thread-locking fluid with the screws. You may use a blue-colored threadlocker if you decide to change your motor later. Red threadlocker is a permanent fix and the only way to remove them is by applying heat.
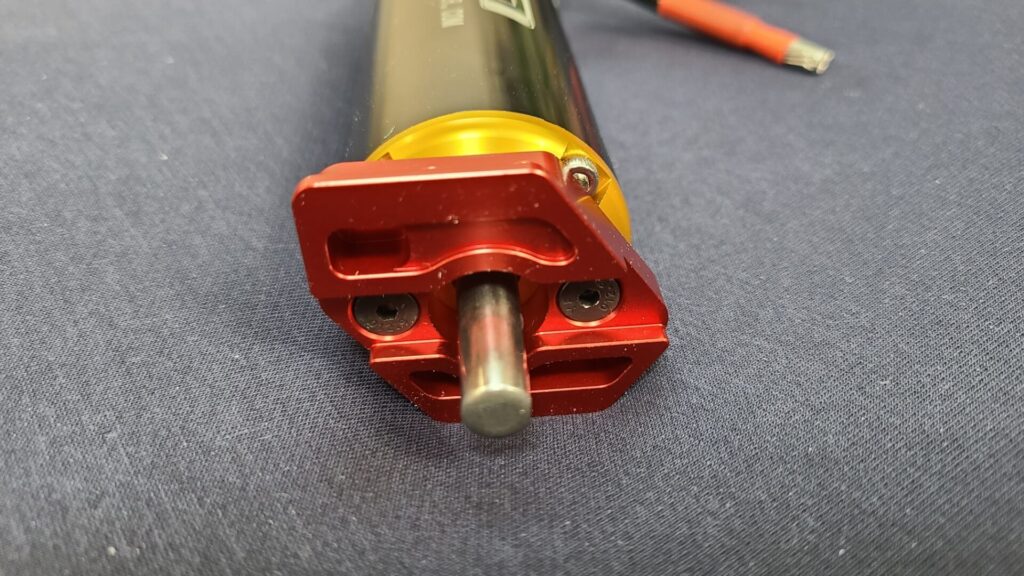
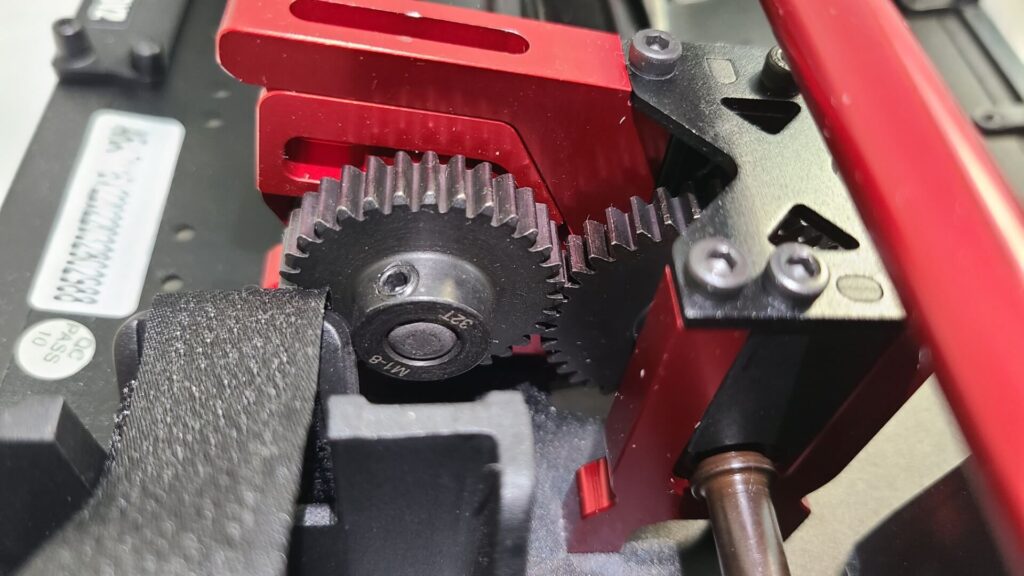
Installing Pinion Gear to Motor
You should mount your pinion gear before you mount the motor on the chassis. Therefore, insert the pinion gear on the motor shaft and align the pinion gear with the spur gear. The photo below depicts the two gears that are properly aligned.
Then, secure the pinion gear by driving the grub screw (screw without a head) into the flat side of the shaft. You should also apply thread-locking fluid inside the grub screw hole.
Mounting Motor on Limitless
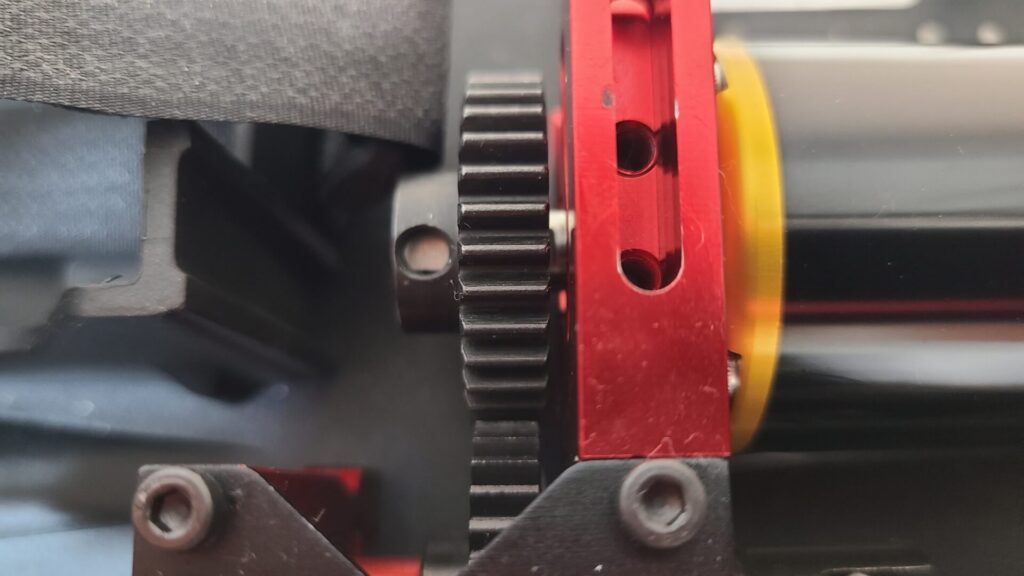
Slide in the motor bracket with the motor attached to the motor mount.
When sliding in the motor mount, you need to ensure the pinion and spur gears comfortably meet with a little gap in between their teeth. Do not tightly place the teeth together.
Once you’re satisfied with the coupling of the pinion and spur gears, secure back the top two screws of the motor mount. You should also use theadlocker on these screws.
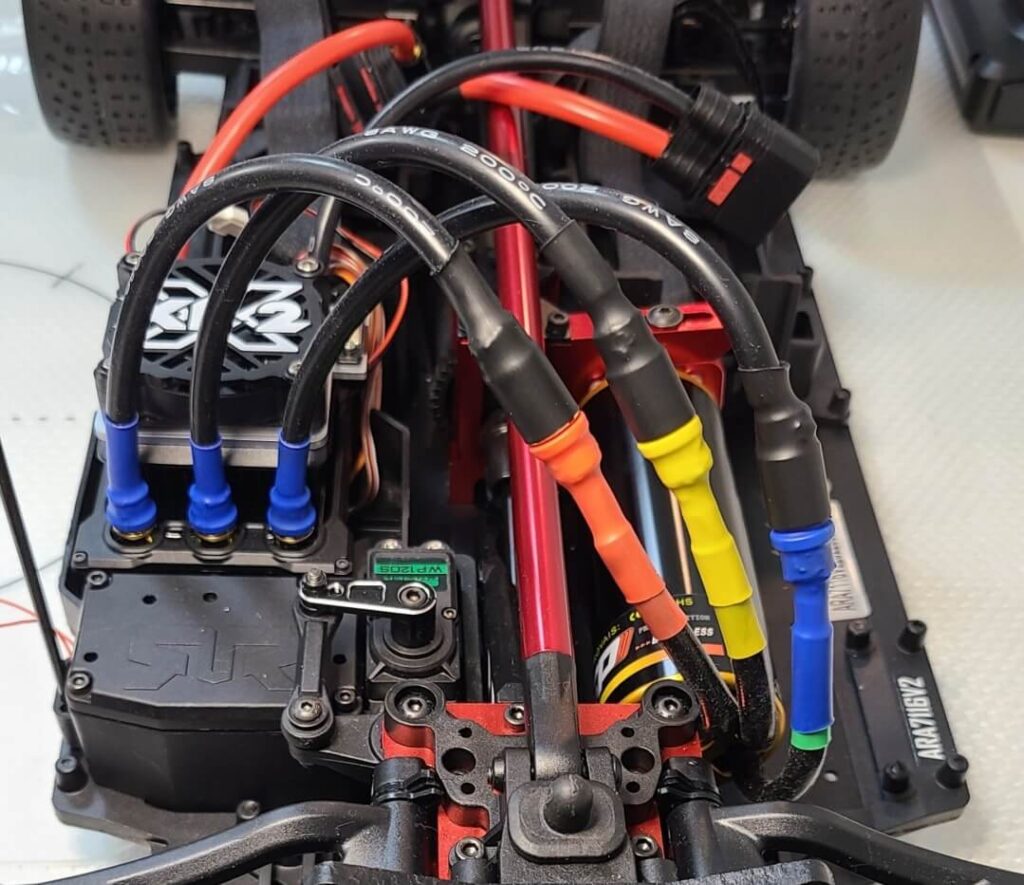
Attaching the Motor Wires to ESC
Lastly, connect the three motor wires to the ESC. If you’re using a sensorless motor, you may connect the three wires in any order. TP 4070 is a sensorless motor so we shall connect the cables as we wish.
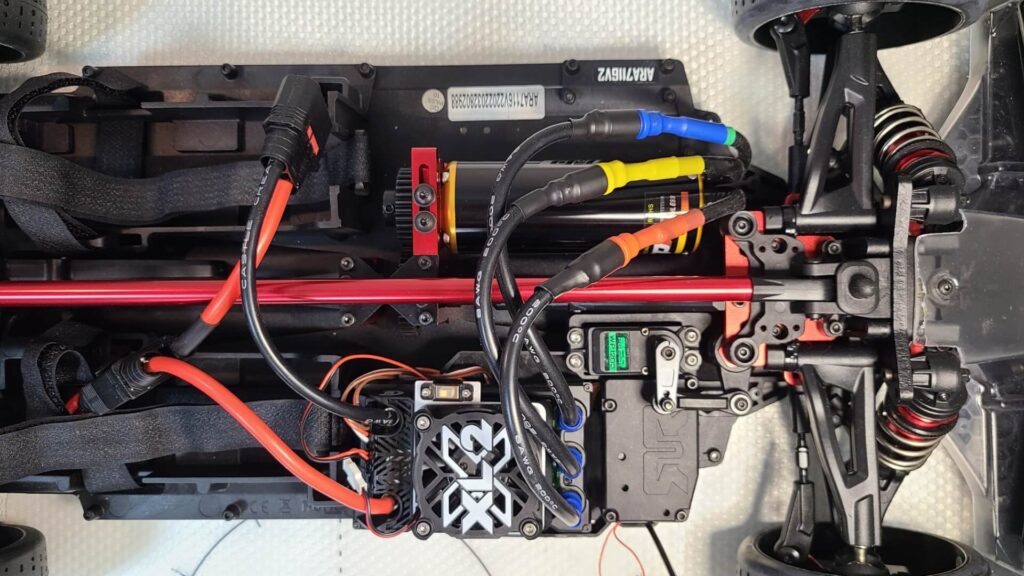
Final Result
The photo below shows all the crucial components installed on Arrma Limitless. You can now hit the road and test drive it. You should also consider installing cooling fans on the motor.
So far, the entire build should not have taken more than a day if you have all the crucial components and tools ready. The remaining tutorials explain how to spray paint the body shell and apply the decals.
Continue to Part 7 – Spray Painting the Body >
If you’re an owner of Arrma Limitless, join us to get a chance to be a world champion in Formula RC.