This is the 4th part of our tutorial series on building Arrma Limitless from scratch. In our part 3 tutorial, we covered how to install an ESC. Now, we learn how to install a radio receiver.
List of Tutorials
Below is the list of all the tutorials in this series.
- Getting Started
- Installing Servo Motor
- Installing ESC
- Installing Receiver
- Installing Servo Horn
- Installing Motor
- Spray Painting the Body
- Applying Decals
Things You Need
Here are the things you need to proceed.
- A radio transmitter and receiver
- Double-sided tape
What is a Receiver
A radio receiver is part of the radio transmission system of any radio-controlled vehicle. It receives the controlling signal from the radio transmitter and sends it across other systems on the RC vehicle such as to the ESC to put the vehicle in motion or servo motor to steer. It can even be used to remotely activate lights for aesthetics or realism.
In this tutorial, we shall use the Radiomaster ER3C-i receiver that supports ELRS long-range protocol and it comes with three channels.
Connecting Wires on The Receiver
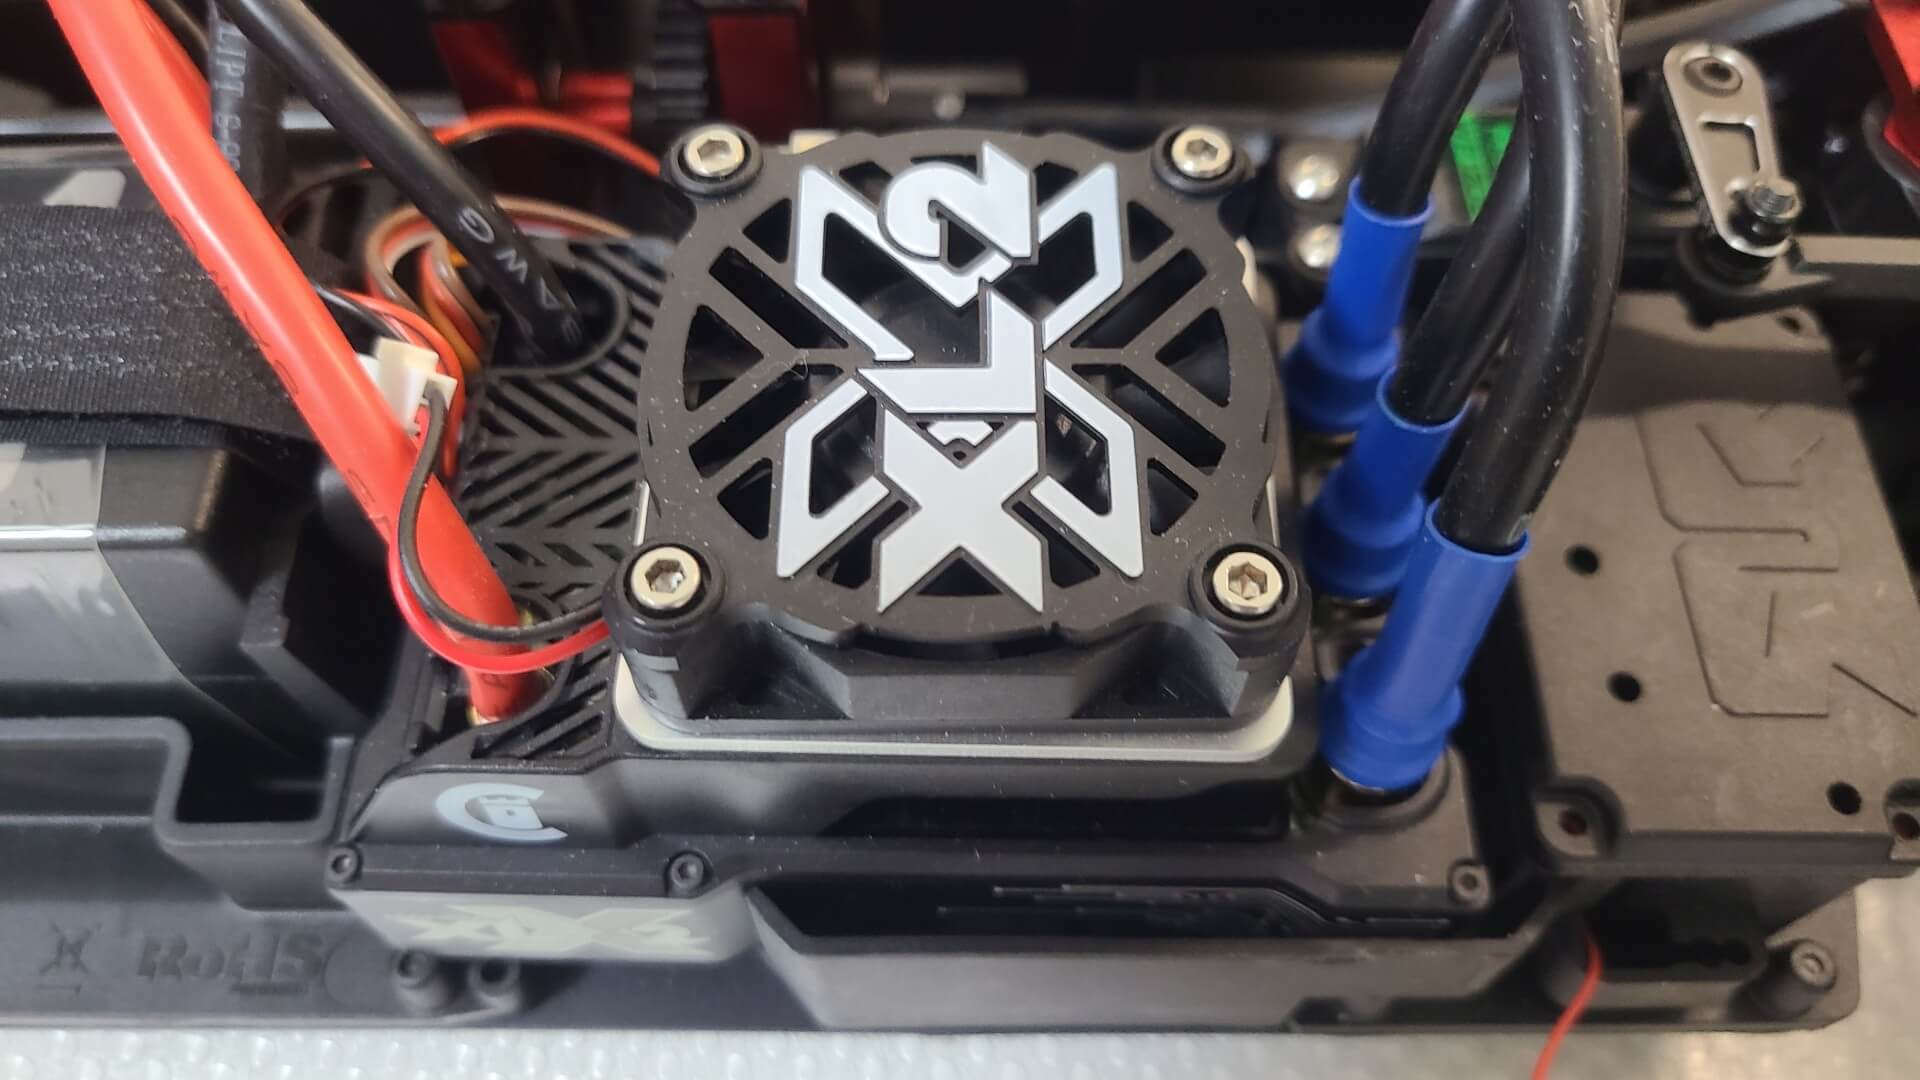
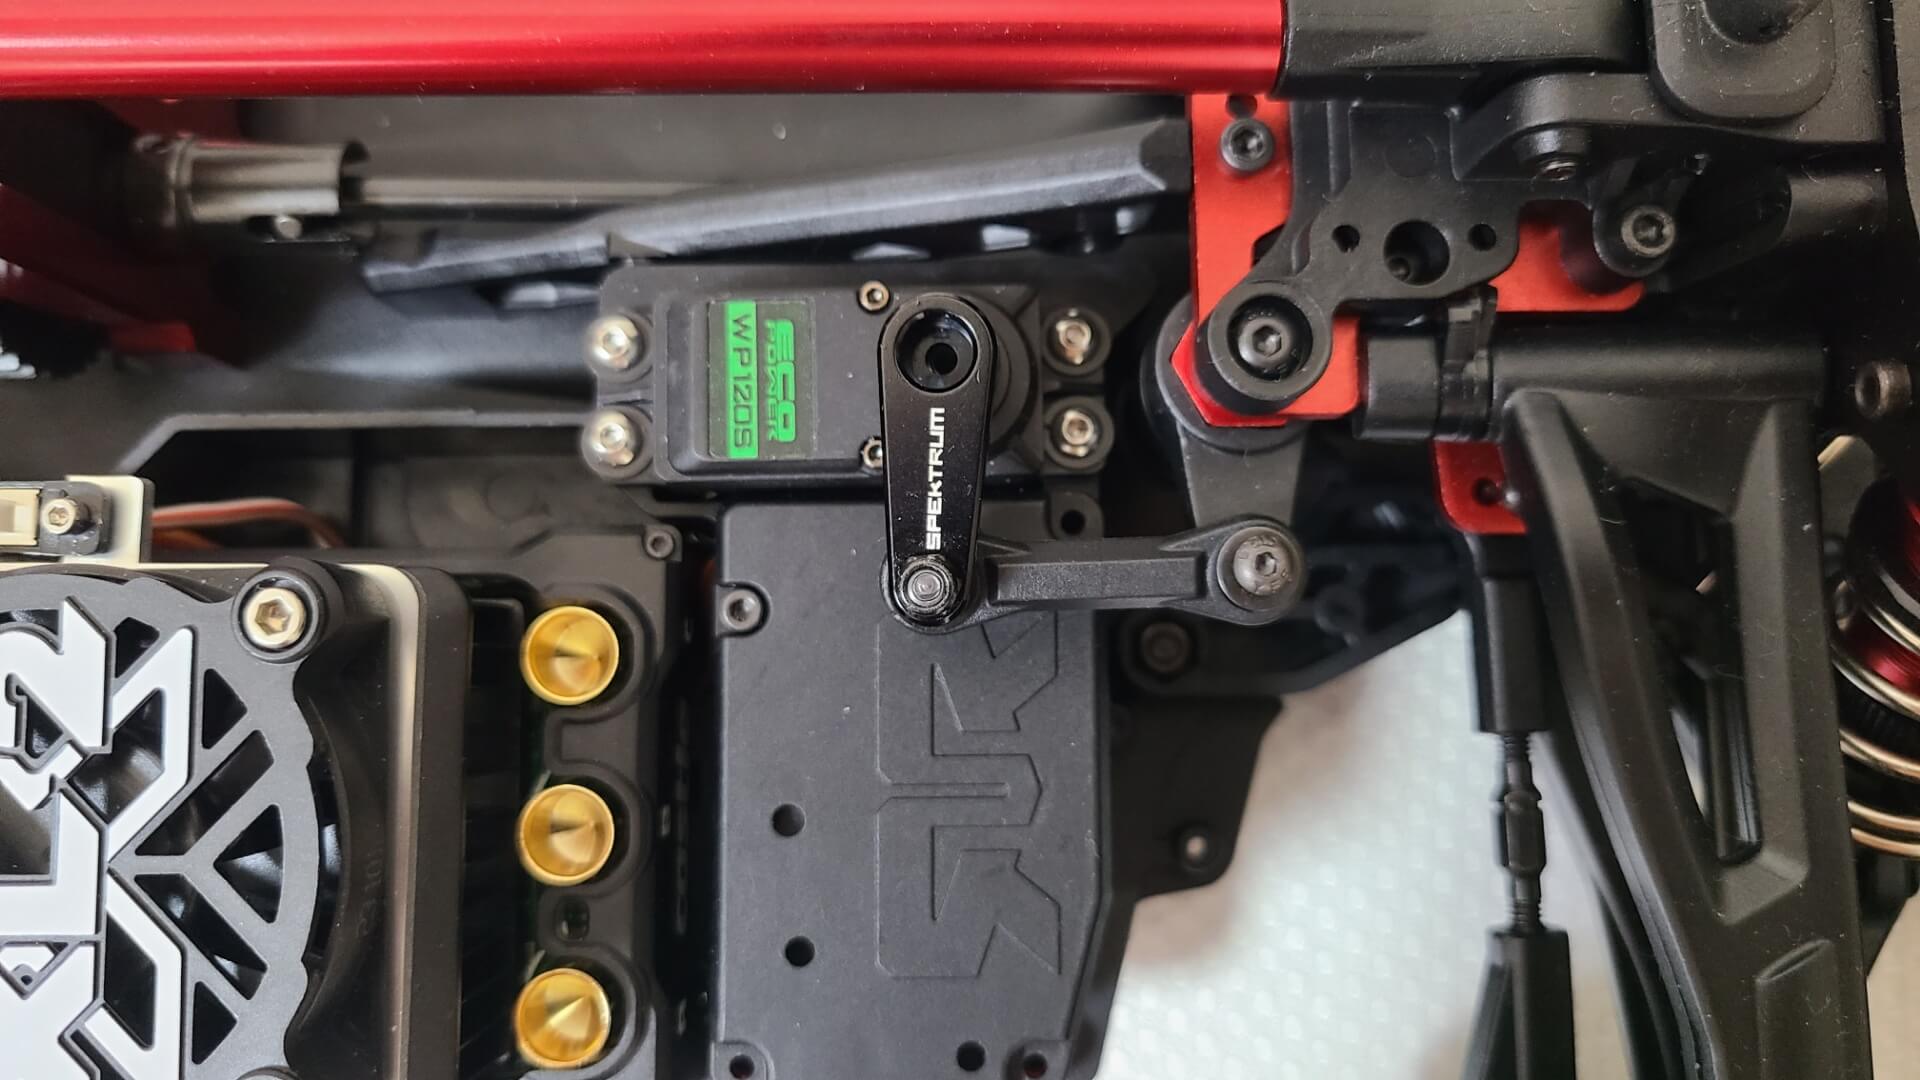
First, we need to connect the ribbon cables from the ESC and servo motor to the receiver. Each channel number should be labeled on the receiver. We are using the Mamba XLX2 ESC and EcoPower servo motor.
Channel 1 is always used for steering while channel 2 is for throttle. This means the servo motor ribbon cable should go be connected to channel 1 and ESC cable should go channel 2.
Each ribbon cable is marked with colors and white (or bright-colored) wire carries the signal while black (or dark-colored) wire is the ground. For XLX2 ESC, you only need to connect the RX cable (brown-red-orange) to the receiver.
When connecting, ensure the white/bright signal wire is at the center of the receiver while the black/dark ground wire is at the edge. Do the same for the servo motor cable where the white/bright wire is at the inside while black/dark on the outside.
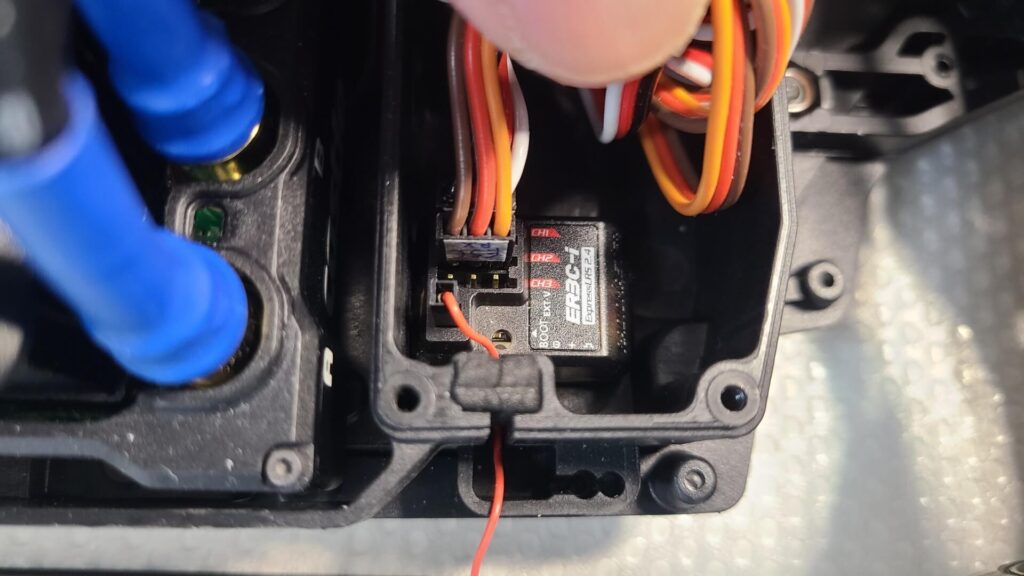
The ER3C-i receiver comes with an antenna wire and it should be connected to the lower left pin. Then, you need to channel the antenna wire through the opening slot to reach to the antenna holder beside the housing. This is where you shall place the antenna wire with the antenna pole.
Binding the Receiver With Transmitter
Before you begin to mount the receiver, it is best to bind the receiver with the transmitter. This binding process allows the transmitter to talk to the receiver and the procedure solely depends on the manufacturer of the transmitter and receiver. In this tutorial, we use the Radiomaster MT12 transmitter, and below is a video on how to bind.
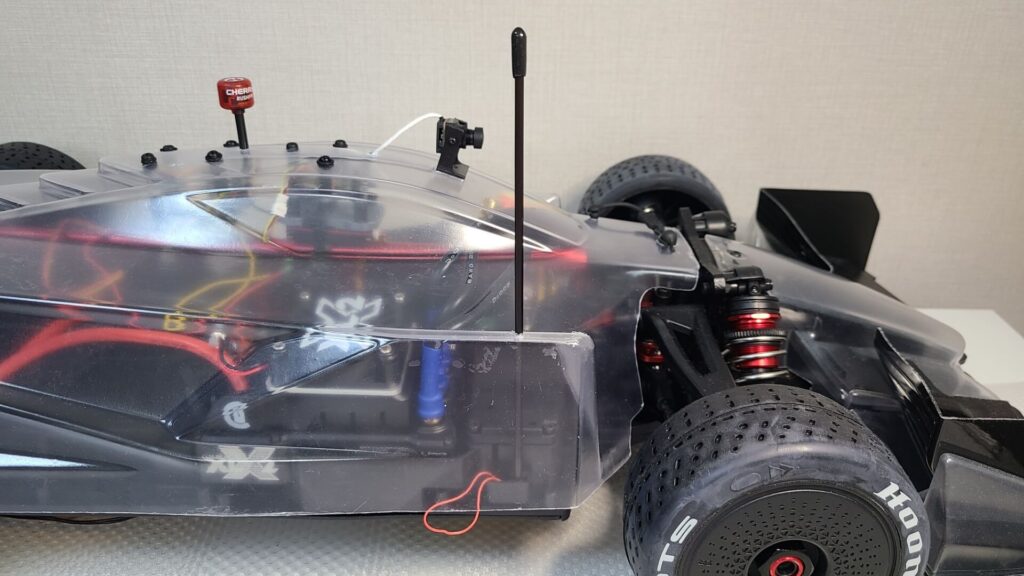
Mounting the Receiver
The receiver should be housed in the receiver box that comes with Limitless. Use double tape to secure it in the box.
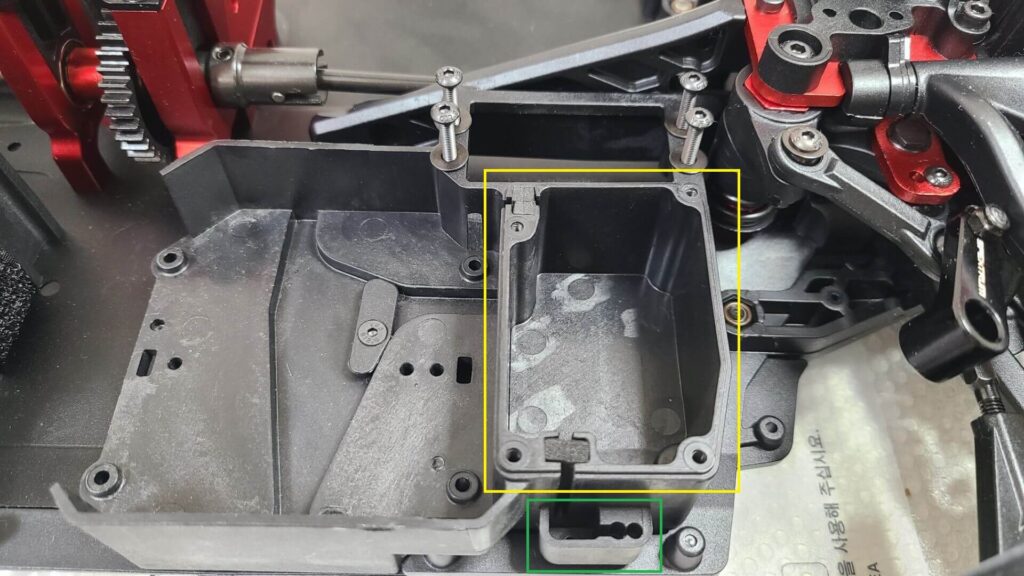
There are two options to mount the antenna on Limitless. You may either insert it into the antenna pole and mount it with the antenna pole holder or tie the antenna wire on the center brace.
Mounting the Antenna Wire with the Antenna Pole
Using the antenna pole offers a longer range of radio transmission. This means your Limitless can travel farther from you. But this requires drilling a hole on the body cover.
Firstly, slowly insert the antenna wire into the antenna pole until it reaches the end cap but ensure that the end of the antenna is not bent while inside the cap. Insert the cap and place the pole at the side of the receiver box. Remember to place the sponge back into the slot.
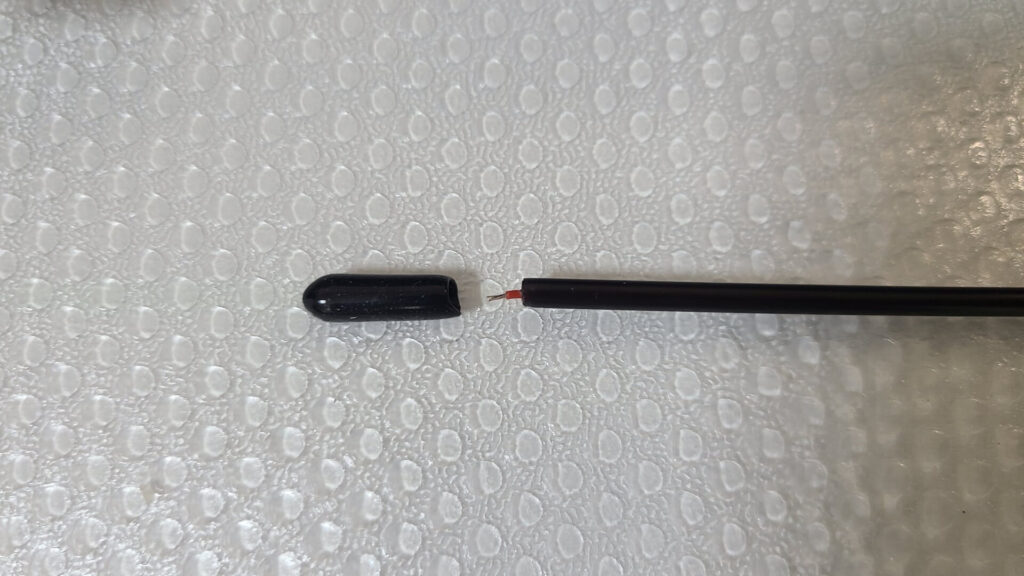
Next, you need to drill a 3mm hole in the body shell. The hole may be slightly larger to accommodate the 3mm diameter pole. The location of the hole should be right on top of the antenna pole holder, or slightly behind it. This ensures that the antenna will have a slight backward tilt rather than a forward tilt. You want to make sure you have enough slack in the antenna wire to aid when removing the body shell.
Mounting the Antenna on the Center Brace
A simpler mounting option is to wrap the antenna wire along the center brace – the red metal bar that goes in the middle of the chassis. You may use cable ties to perform this but make sure you keep the wire far from moving parts such as the servo horn and the gears.
Part 5 – Installing Servo Horn >
If you’re an owner of Arrma Limitless, join us to get a chance to be a world champion in Formula RC.