This is the part 2 of our tutorial series on how to build Arrma Limitless from the ground up. In our part 1 tutorial, we covered the necessary parts you need to purchase as well as the recommended tools. Now, we shall begin with the one of the most simple steps that is to attach a servo motor on Limitless.
List of Tutorials
Below is the list of all the tutorials in this series.
- Getting Started
- Installing Servo Motor
- Installing ESC
- Installing Receiver
- Installing Servo Horn
- Installing Motor
- Spray Painting the Body
- Applying Decals
Things You Need
Here are the things you need to proceed.
- RC servo motor
- Hex/Allen keys – comes with Limitless package
What is a Servo Motor
An RC servo motor is used to control the steering of your RC car. Think of it like power steering for your full-size car. It receives the signal from your radio transmitter to turn your car left or right. It is connected to a servo horn that is coupled to the steering mechanism of your Limitless.
For the sake of convenience in building, we shall leave the installation of the servo horn later in the series.
Recommended Servo Motor for Limitless
You need a sufficiently powerful servo motor that imparts high torque to steer a large and heavy RC vehicle like the Limitless. There are dozens of recommendations online on what is the best servo motor to use, but for this tutorial, we shall use the EcoPower WP120S which comes with a coreless motor, waterproof housing and a metal gear. It is recommended for 1/10 scale RC vehicles for racing or bashing and it is also affordable for servos in its range.
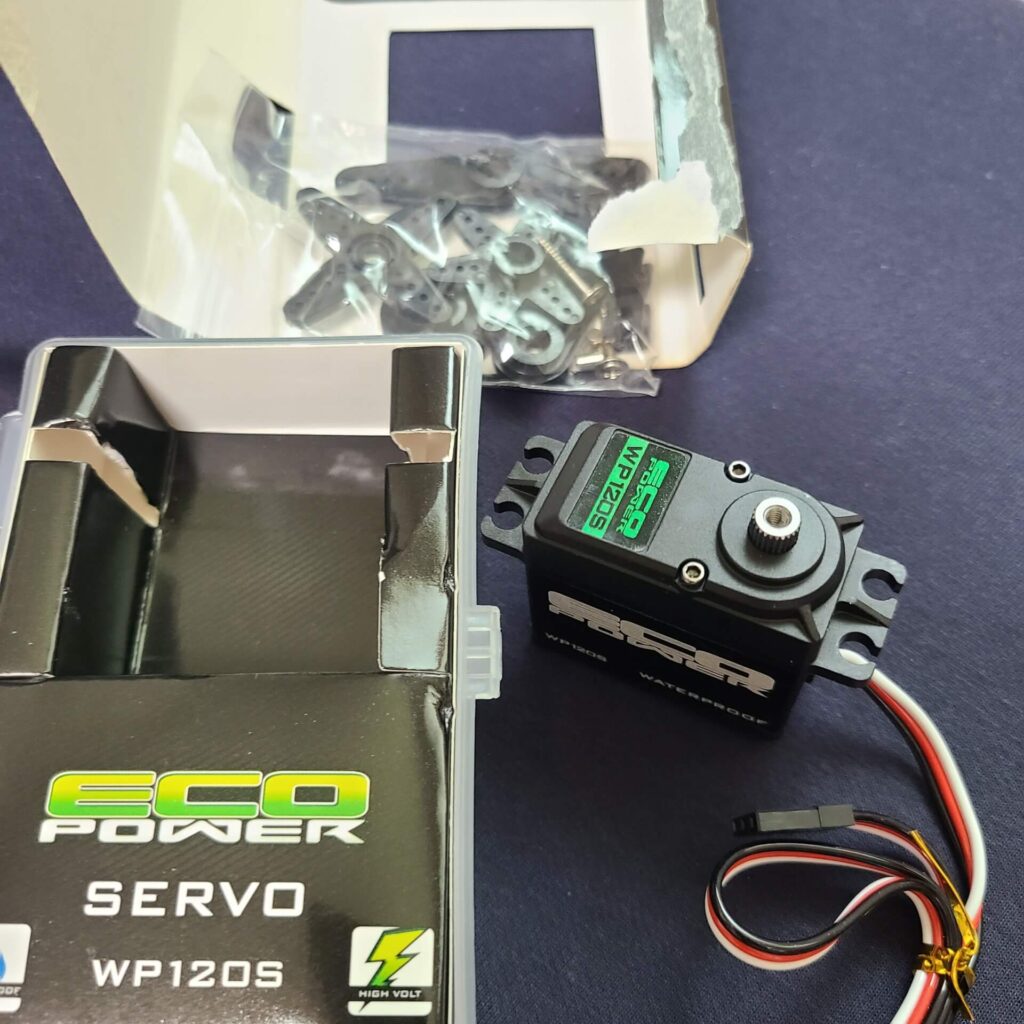
It comes with a 23-tooth output shaft (spline), not the 25-tooth that Arrma recommends. 23T is the general standard these days so it may be easier to find servos with 23T than 25T.
If you purchased a servo motor with 25T, you need to also buy a servo horn that supports 25T since the one included with your Limitless is only 23T.
Most RC servo motor comes with standard dimensions but the maximum size Limitless allows is 28.5mm (length), 41.5mm (width) and 22mm (height).
Installing the Servo Motor
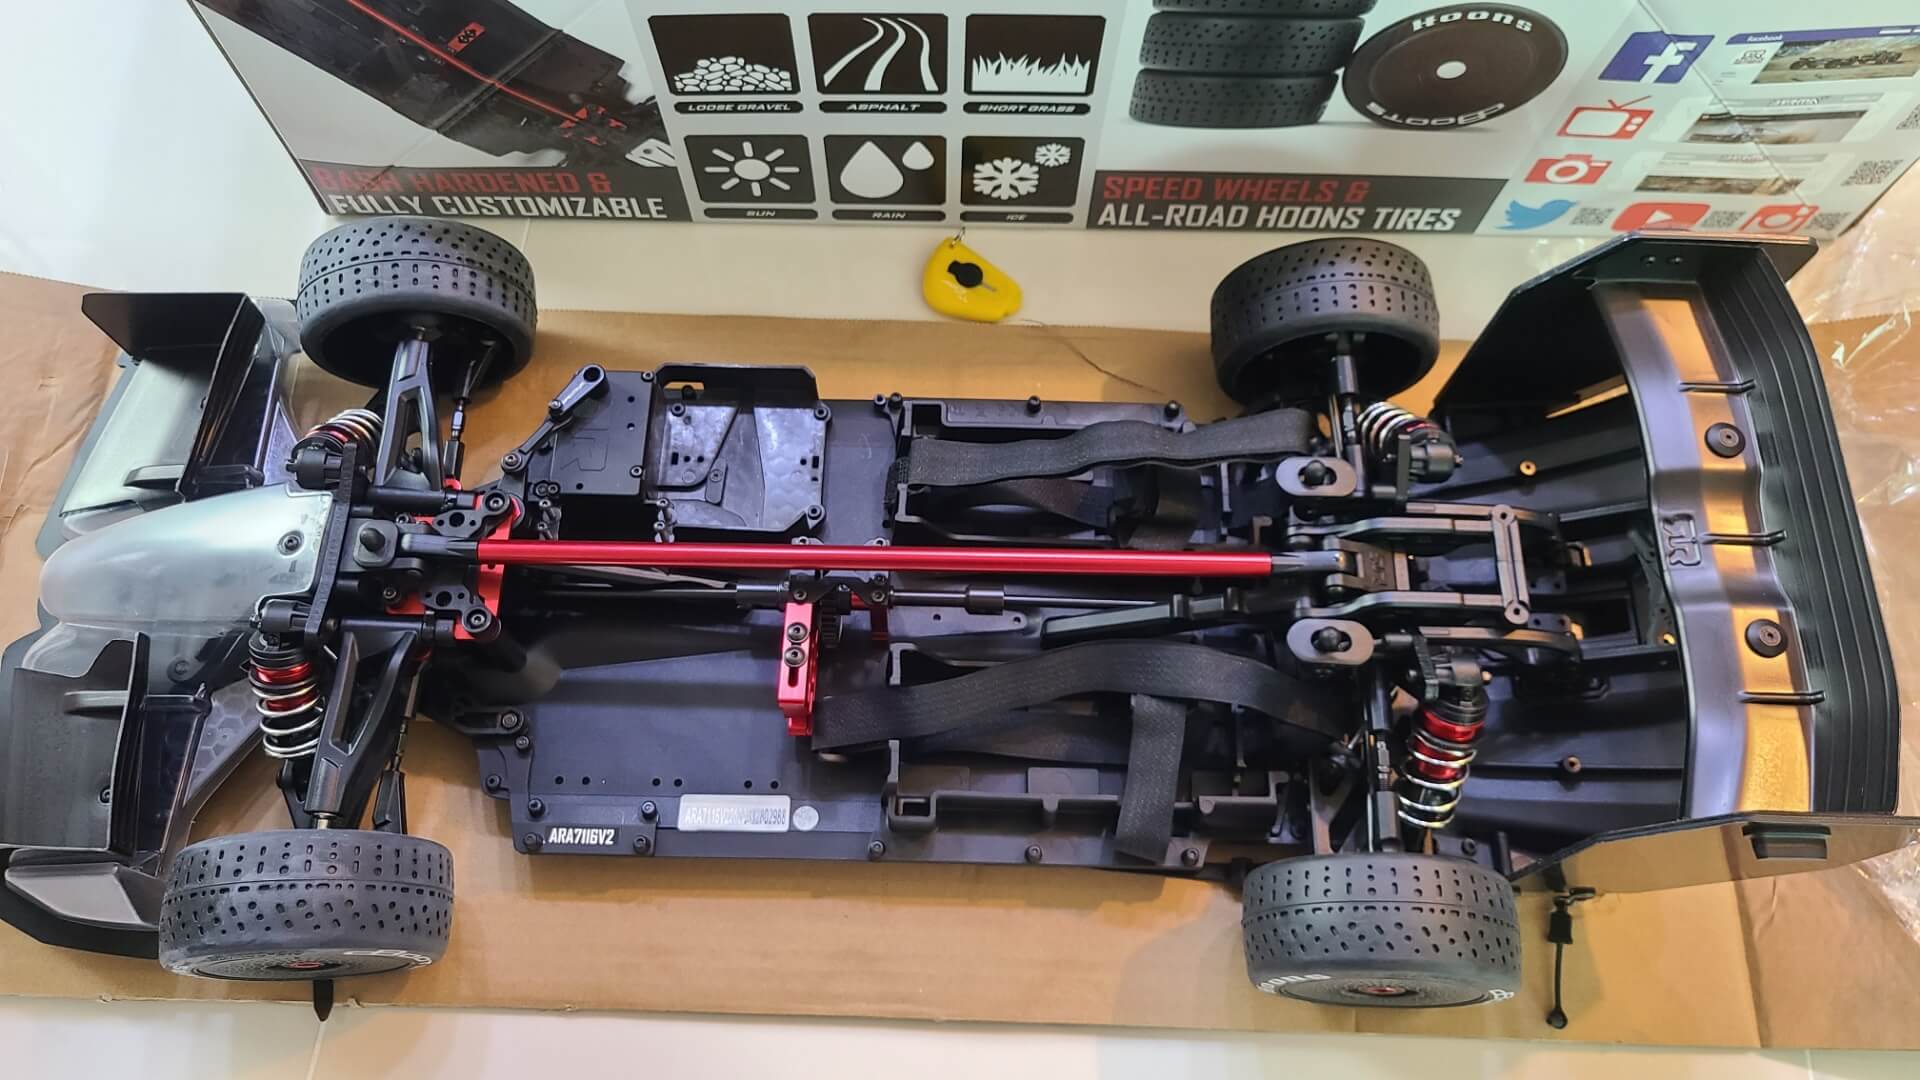
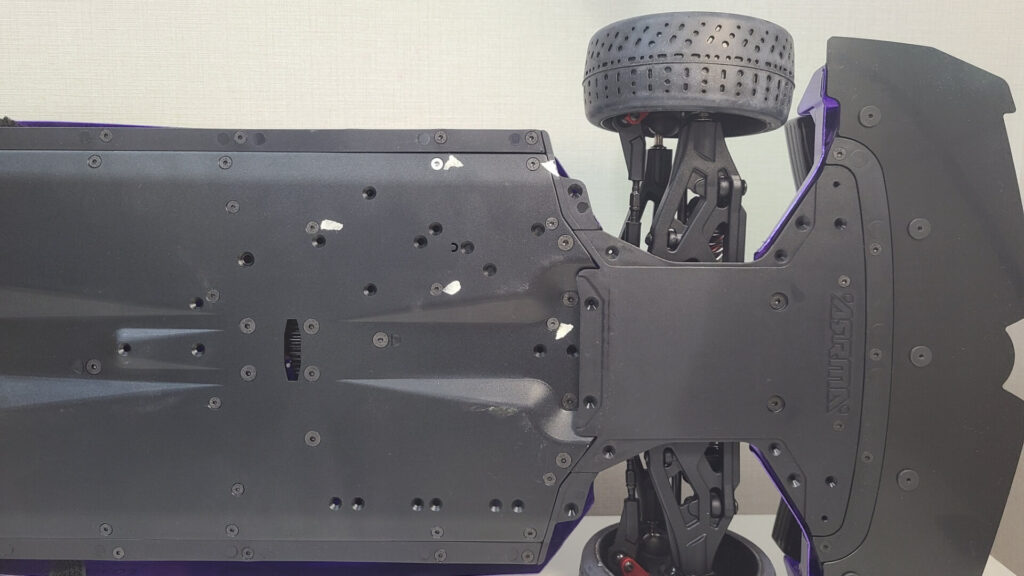
The Limitless rolling chassis houses the servo motor, ESC and receiver in one separate and detachable compartment. This makes it easier for you to install all these three components.
You should detach this compartment by removing five screws from the bottom of the chassis. You’re recommended to mark these screw holes to ease identification since there are numerous other screw holes that are left empty underneath the chassis.
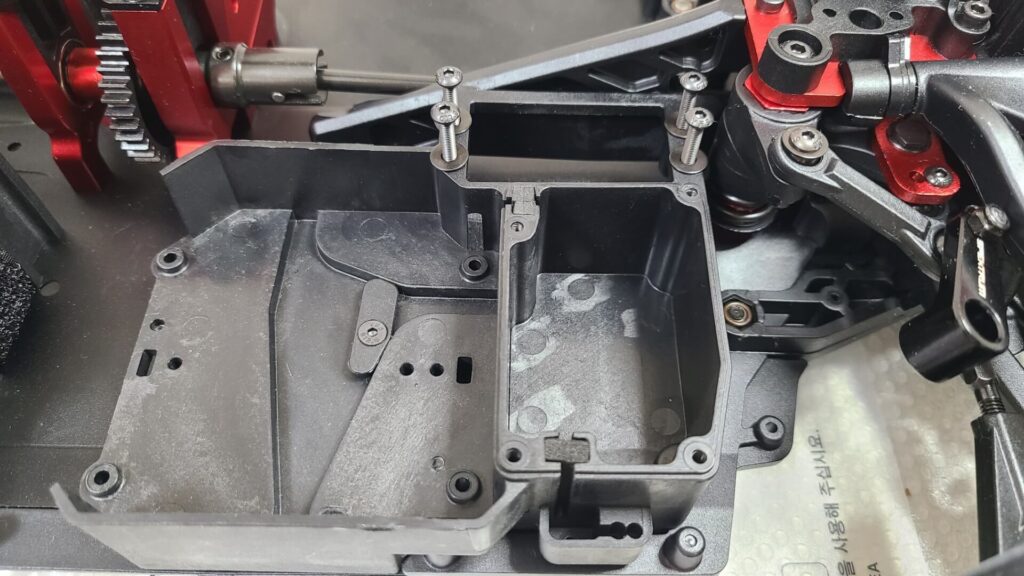
Once you have removed the compartment, go ahead and remove the four long hex screws that come with shims. These screws shall be securing your servo motor in place. Then, place your servo in the box.
Next, you need to insert the servo’s wire through the small slot in the bottom left edge of the box. This will allow the wire to pass into the adjacent radio receiver box. It is from the receiver that the servo motor will obtain its power and signal. Hence, remove the sponge that is blocking the slot in the receiver box and insert the servo cable through the slot.
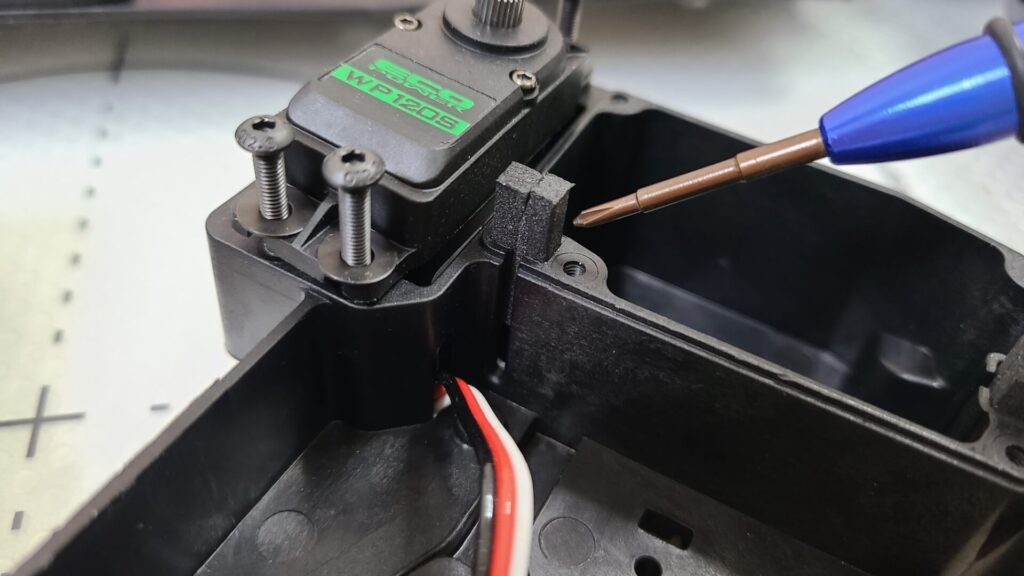
Once your wire is properly placed in the receiver box, go ahead and secure the servo motor with the four long screws and washers.
Ensure the screws holding the servo are tight because the servo needs to be tightly secured to prevent any reactive motion when it is steering the front wheels. Having an electric-powered screwdriver with hex bits would absolutely help during this installation.
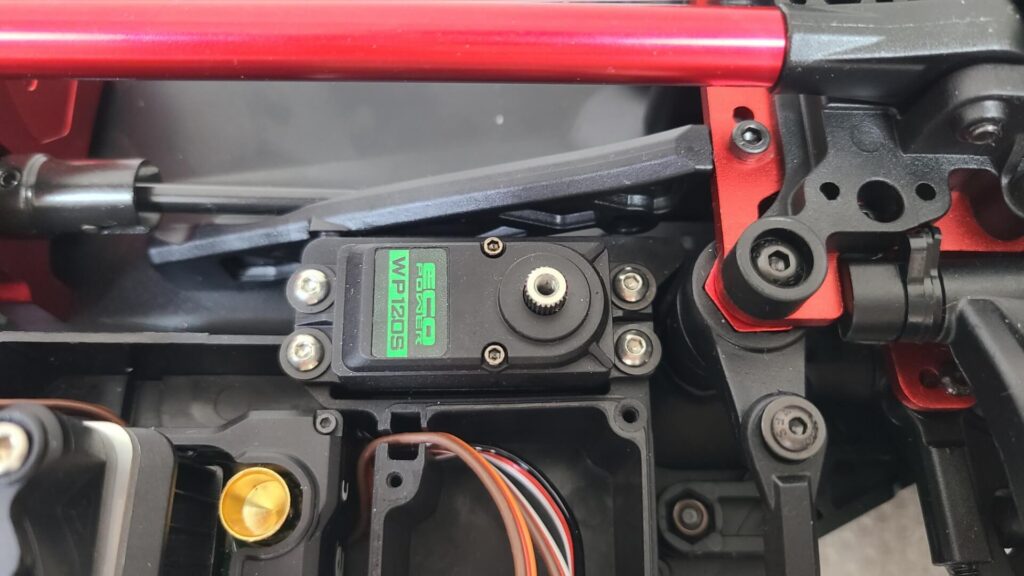
Surprisingly, you may find that the four screws holding down the servo are too long to be tightened in. The most probable reason is that your servo is slightly larger than average. It should have a length of 40mm or less. Ours is 40.25mm. Therefore, we used shorter screws that come with the recommended Limitless screw set box. Finally, your servo motor installation should look like below.
Continue to Part 3 – Installing ESC >
If you’re an owner of Arrma Limitless, join us to get a chance to be a world champion in Formula RC.