It goes without saying that if you’re racing, speed running, or bashing your Limitless, installing a cooling fan on your motor is considered a must. This detailed tutorial aims to help you choose the right fan and how to mount it on an Arrma Limitless RC car.
Things You Need
- RC motor cooling fan
- Radio receiver
- Hex/Allen or Phillips screwdriver – the type depends on the screws used with your fan
- Limitless hex (Allen) screwdriver – to open your Limitless receiver box
- Cable tie
What is an RC Cooling Fan
The main purpose of a cooling fan for an RC vehicle is to cool the motor. These motors tend to overheat under heavy use and to prevent thermal shutdown or damage, you should ensure they stay under a certain temperature.
Cooling fans are specified with a 4-digit number which represents the width, length and height. For instance, a 4010 cooling fan means it has a length and width of 40mm and a height of 10mm. Keep in mind, that these fans always come in square shapes.
Different fans have different speeds measured in RPM (revolutions per minute) and most of them come with 5V input voltage. The input power can be tapped from a radio receiver which usually provides a 5V output.
Choosing the Right Fan For Limitless
Selecting the best cooling fan for your Limitless highly depends on the length and diameter of your motor and the intended use of the RC car.
Typically, cooling fans should keep your motor temperature below 70 degrees Celsius (158 F).
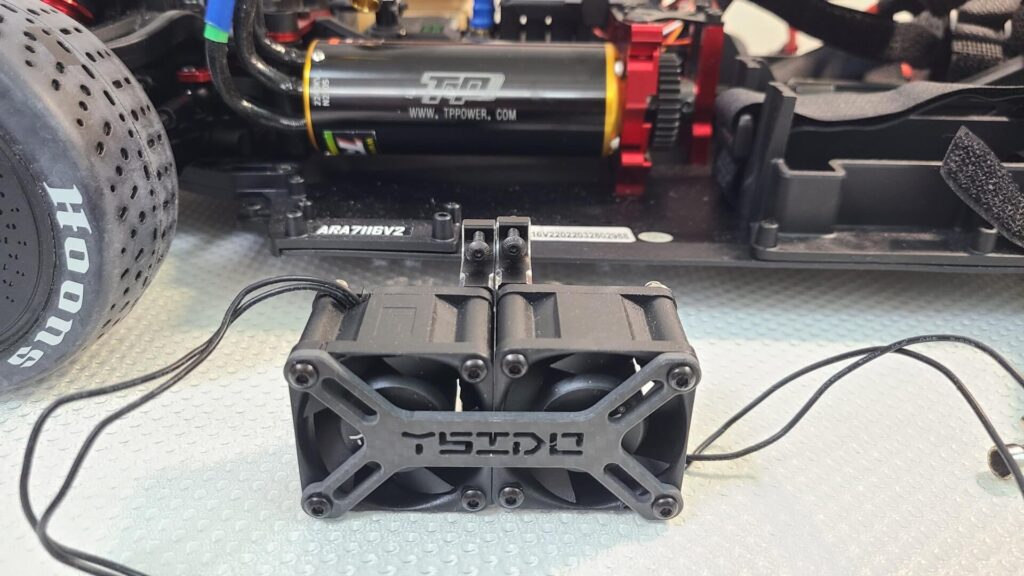
The photo below shows two 3010 cooling fans mounted on a TP 4070 brushless motor. The total length of the two fans is 60mm (30mm X 2) while the motor body length is 107mm. The fans look rather small for the motor and they may struggle to keep the temperature down, especially if the RPM is low. Therefore, we recommend fans that cover most of the motor length.
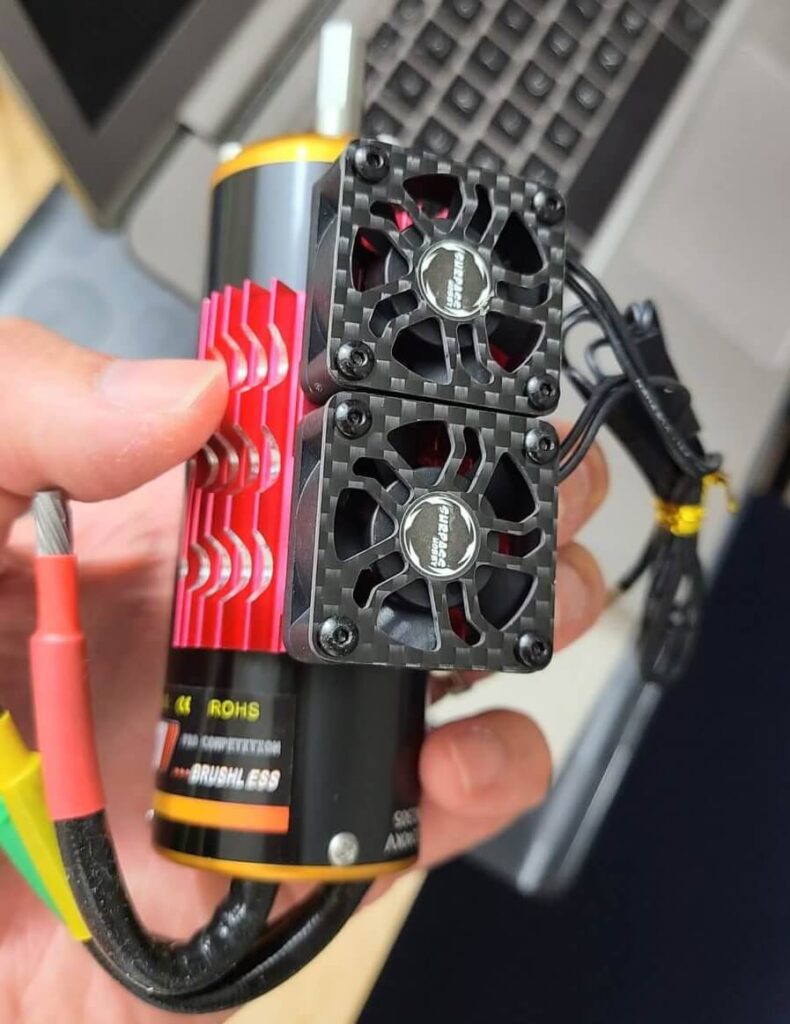
You may wish to include a heatsink together with your fans. The mount for the cooling fans above is essentially an aluminum heat sink and it might help dissipate heat more efficiently.
Some RC experts argue that the body of the motor already acts as one complete heatsink, hence, making additional heatsink futile.
Cooling fans with faster RPMs can obviously remove heat faster. But how fast is fast? Again, this depends on your usage but the recommended speed is 12,000RPM and above. As long as your fan can keep the motor temperature below the maximum allowable heat, you should be fine.
Installing Cooling Fans on Limitless
In this tutorial, we shall demonstrate how to install the YSIDO 4010 double-cooling fan with TP 4070 brushless motor. The motor fans come with the following specifications.
- Fan RPM: 16,000RPM at 8.4V and 12,000RPM at4.8V
- Size size: 40mm X 40mm X 10mm /1.57 in X 1.57 in X 0.39in
- Weight of each fan: 14g/0.49oz
- Comes with two aluminum motor mounting brackets that fit a 40mm diameter motor
- Includes a front fan holder
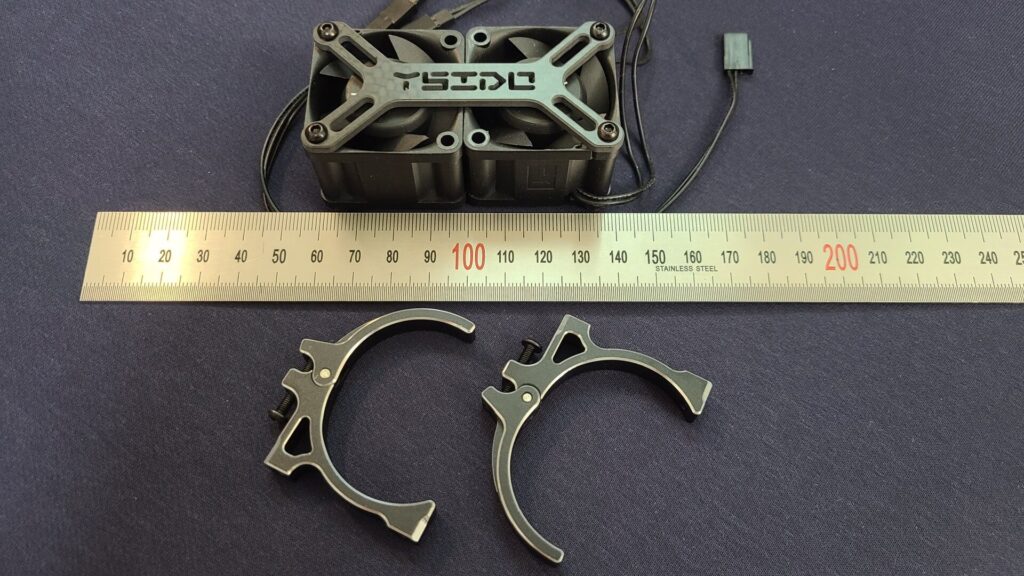
First, we need to couple the fans with the front holder. This will secure the two fans in a row. Once they are secured, we shall mount the fans on the two brackets, as shown below.
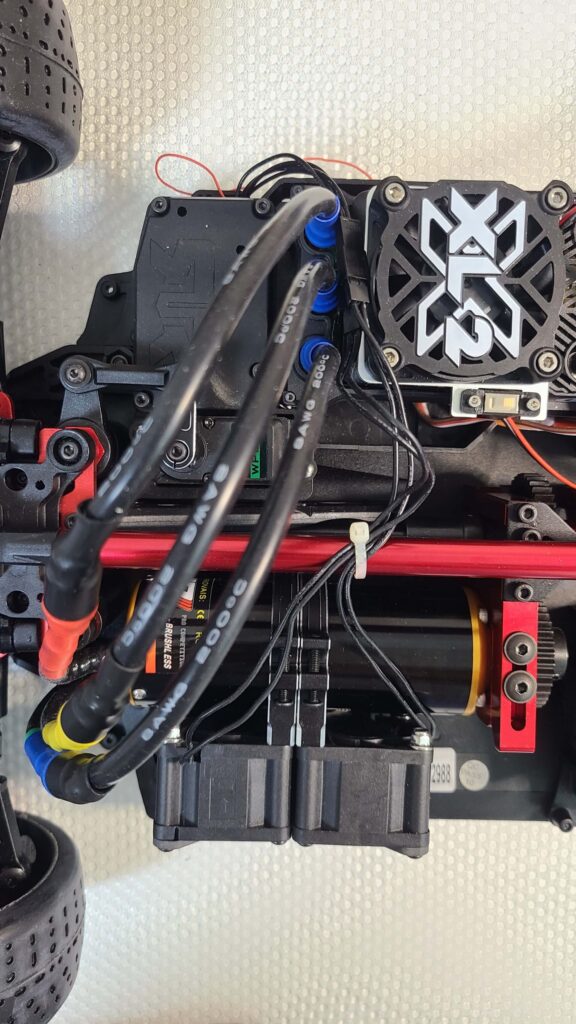
Next, we shall mount the brackets on the body of the motor. Make sure the brackets are sitting at the center of the body. Then, we need to connect the wires to the receiver box.
Make sure the wires are away from moving parts in the chassis such as gears, central shaft and servo horn.
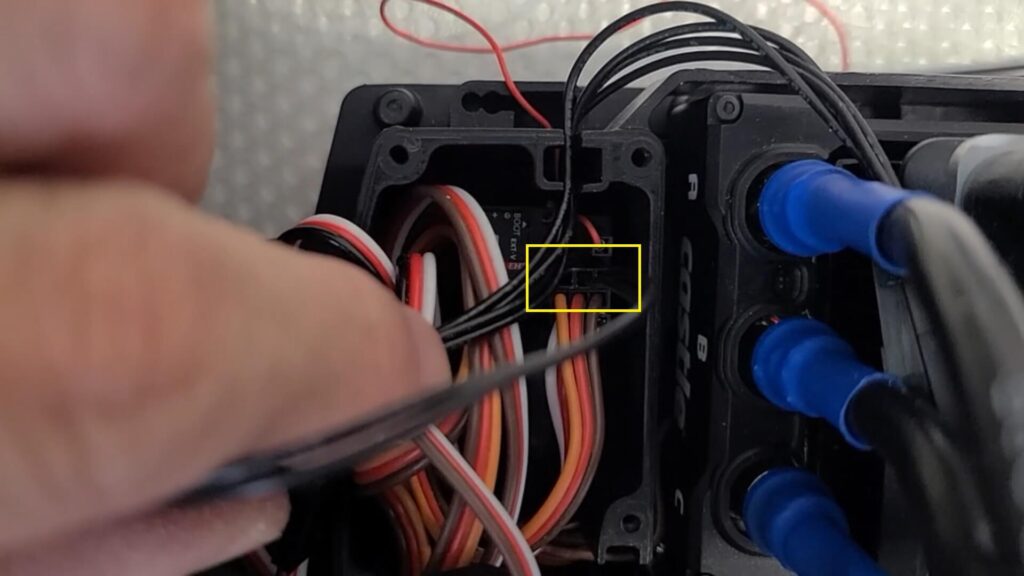
We shall tie the wires to the center brace (red metal bar in the middle) with a cable tie and pass it through the ESC and into the opening slot of the receiver box. Within the receiver box, we shall connect the fan’s JST connector to channel 3 of the receiver.
The fan power cables should be inserted into the last two pins on the receiver. Meaning the pins nearest to the outer edge of the receiver housing. These pins are usually the power supply pins.
Final Result
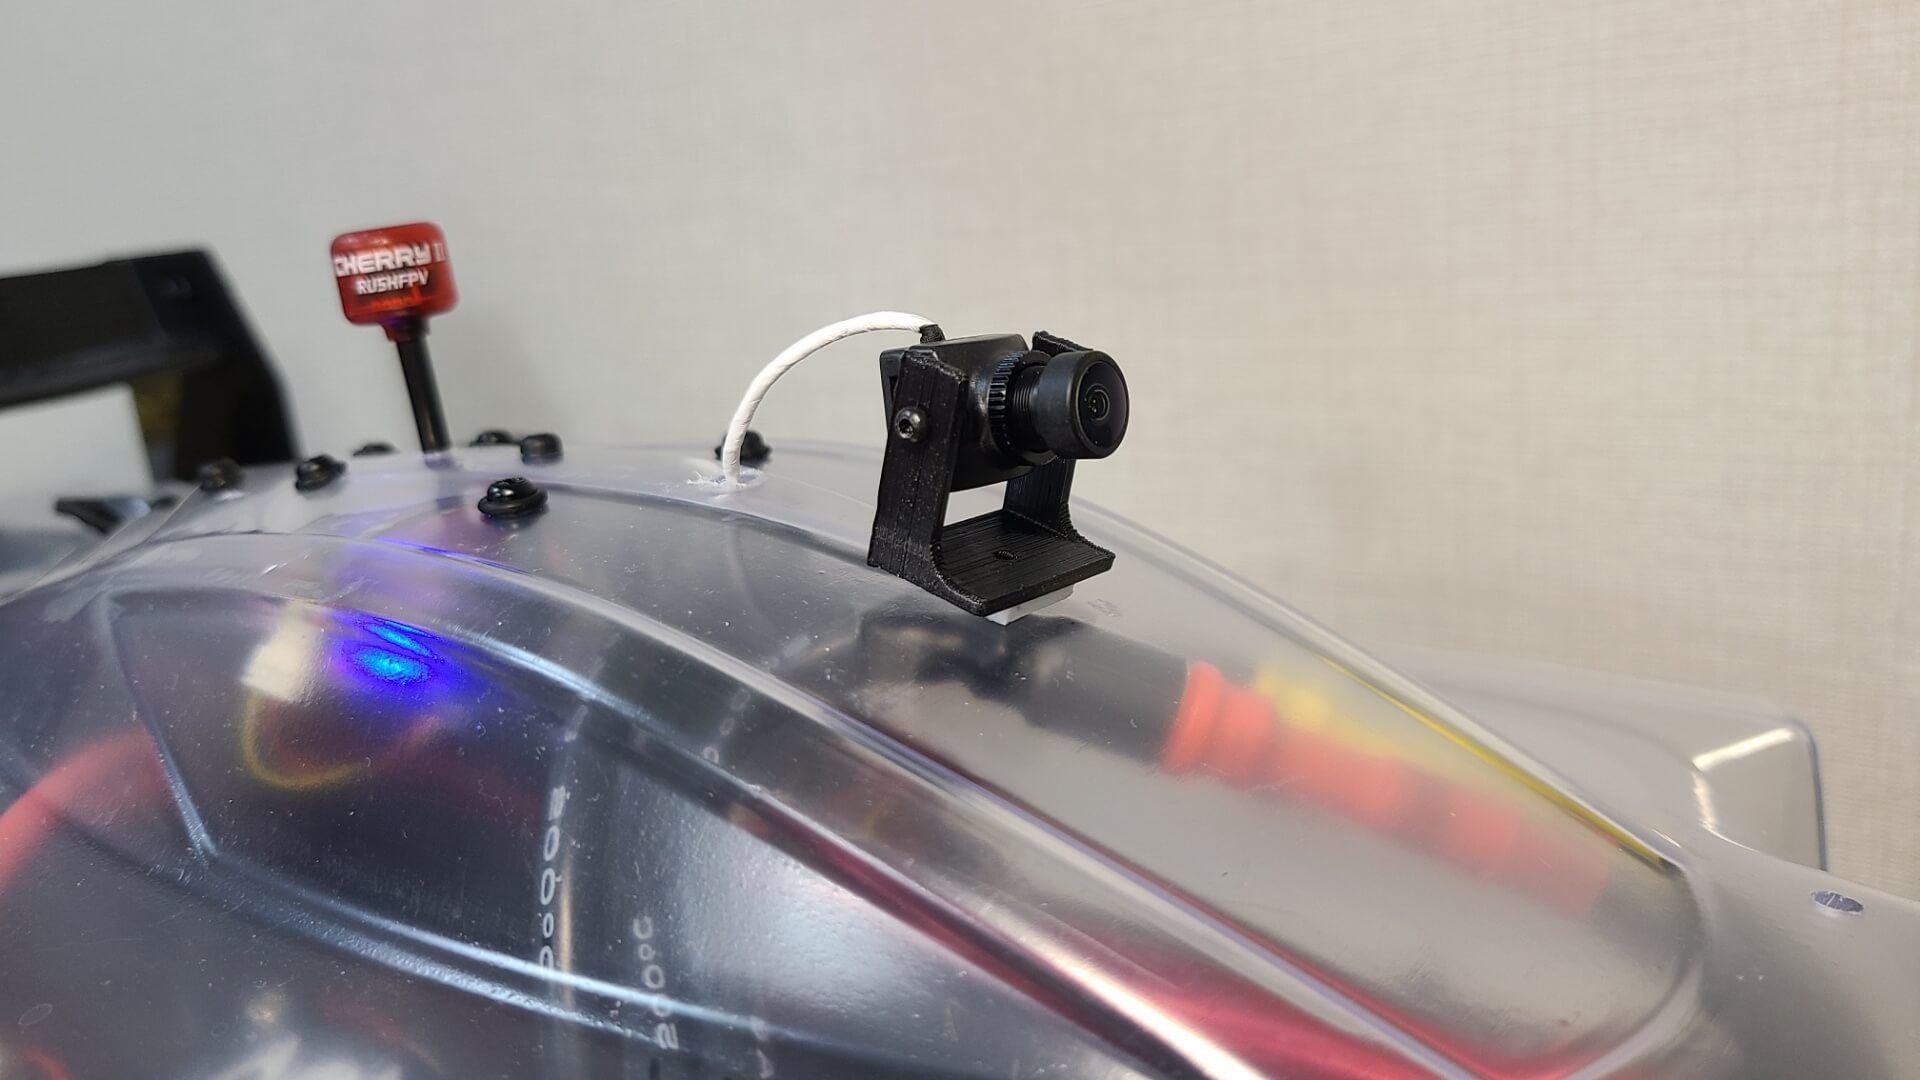
Once everything is installed, we may power on the ESC to hear and see the cooling fans spinning, as shown below.
If you’re an owner of Arrma Limitless, join us to get a chance to be a world champion in Formula RC.